
Studio Sign with Derwent Inktense Pencils

I used Corel Paintshop Pro to edit my photo to a black and white drawing and printed it, but any photo-editing software will work. I placed tracing paper over my black and white printout and using a fine tipped black marker, I outlined the parts of the photo I wanted to include in my art quilt. I then took the traced outline, taped it down to a table and placed my white cotton fabric over top. I taped this in place too, just to make sure it didn't move. Then, using the drawing underneath, I sketched the lines on to the fabric with a pencil. A lightbox could also be used, but I didn't need it.
I then created my quilt sandwich by placing the cotton fabric with the pencil sketch on top of 100% cotton batting and my backing fabric. I pressed and secured the quilt sandwich with basting spray and set up my machine for free-motion sewing. It is very easy, just follow the pencil lines and its not a problem if you go over the same line twice. It just gives it more of a sketchy look! Here is my quilt after most of the sketch lines were sewn in black thread.

Now the really fun part. Coloring in the scene with the Inktense pencils. So easy, it only took about 30 minutes to put all the color in. Here it is with just the pencil color, before it is painted with water.

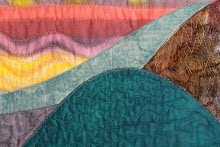
And here is the result after painting with water. The color intensifies!

I set the Inktense color with my iron. Then I thread sketched the entire scene and added a satin stitch border. Here is my completed art quilt ready to hang on my studio door!

No comments:
Post a Comment